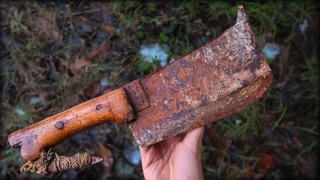
Изготовление ножен для маленького японского ножа

Making Matching Saya For The Petty
Saya is the Japanese term for a scabbard. Making one for the petty I made last week.
I’ve not done much research on how these where traditionally made, this is the process I came up with for my materials and tools, there are probably plenty other and better ways to make these.
I also have to say this project took me quite longer than I thought it would, it turns out fitting a saya to a blade is not that straight forward or quick!
At the end this came out decently, but there is of course room for improvements. On the olive burl wood is very easy to spot the seam and adding a liner between wood and brass was not ideal since it looks like it’s abrasive enough to compromise the mirror finish on the blade.
Index of operation and materials:
0:04 Cutting material with band saw (olive burl, ebony, and walnut)
0:32 Grinding flat all surfaces that receive glue
0:59 Epoxy resin
1:22 Cutting excess material with band saw
1:48 Grinding square with 2x72 belt grinder
2:11 Splitting the blank in two, I should have left one side thicker since all the pocket will be in one side
2:40 tracing blade geometry and marking a groove with a kiridashi shy of the marking to prevent overshooting
3:07 Chiseling the pocket with various woodworking tools, the one I used most are the small and large flat chisel
4:12 Profiling the saya now so I know where to stop
4:26 Refining the shape with belt grinder
4:49 Glueing with epoxy resin, being carefull to align perfectly the two side
5:55 Marking on a piece of paper the shape of the pocket with a pencil
6:10 Transfering this shape on a piece of brass
6:16 Drilling a series of holes to remove most of the material
6:40 Opening the groove with needle files, went a bit wider then the pocket on the saya so the blade does not slide on the brass guard
7:00 Hammering a texture with a very small ball peen hammer
7:21 Glueing the guard with superglue, should be enough here is since it’s not subjected to any force and it does not squeeze out like epoxy
7:40 Grining guard to shape, cooling in water to prevent superglue failure
8:00 Forced patina on the guard to add contrast with antique solution
8:22 White mineral oil as finish

{$ noItemsMessage $}